
A Homeowner’s Guide to the Installation of Guardrails
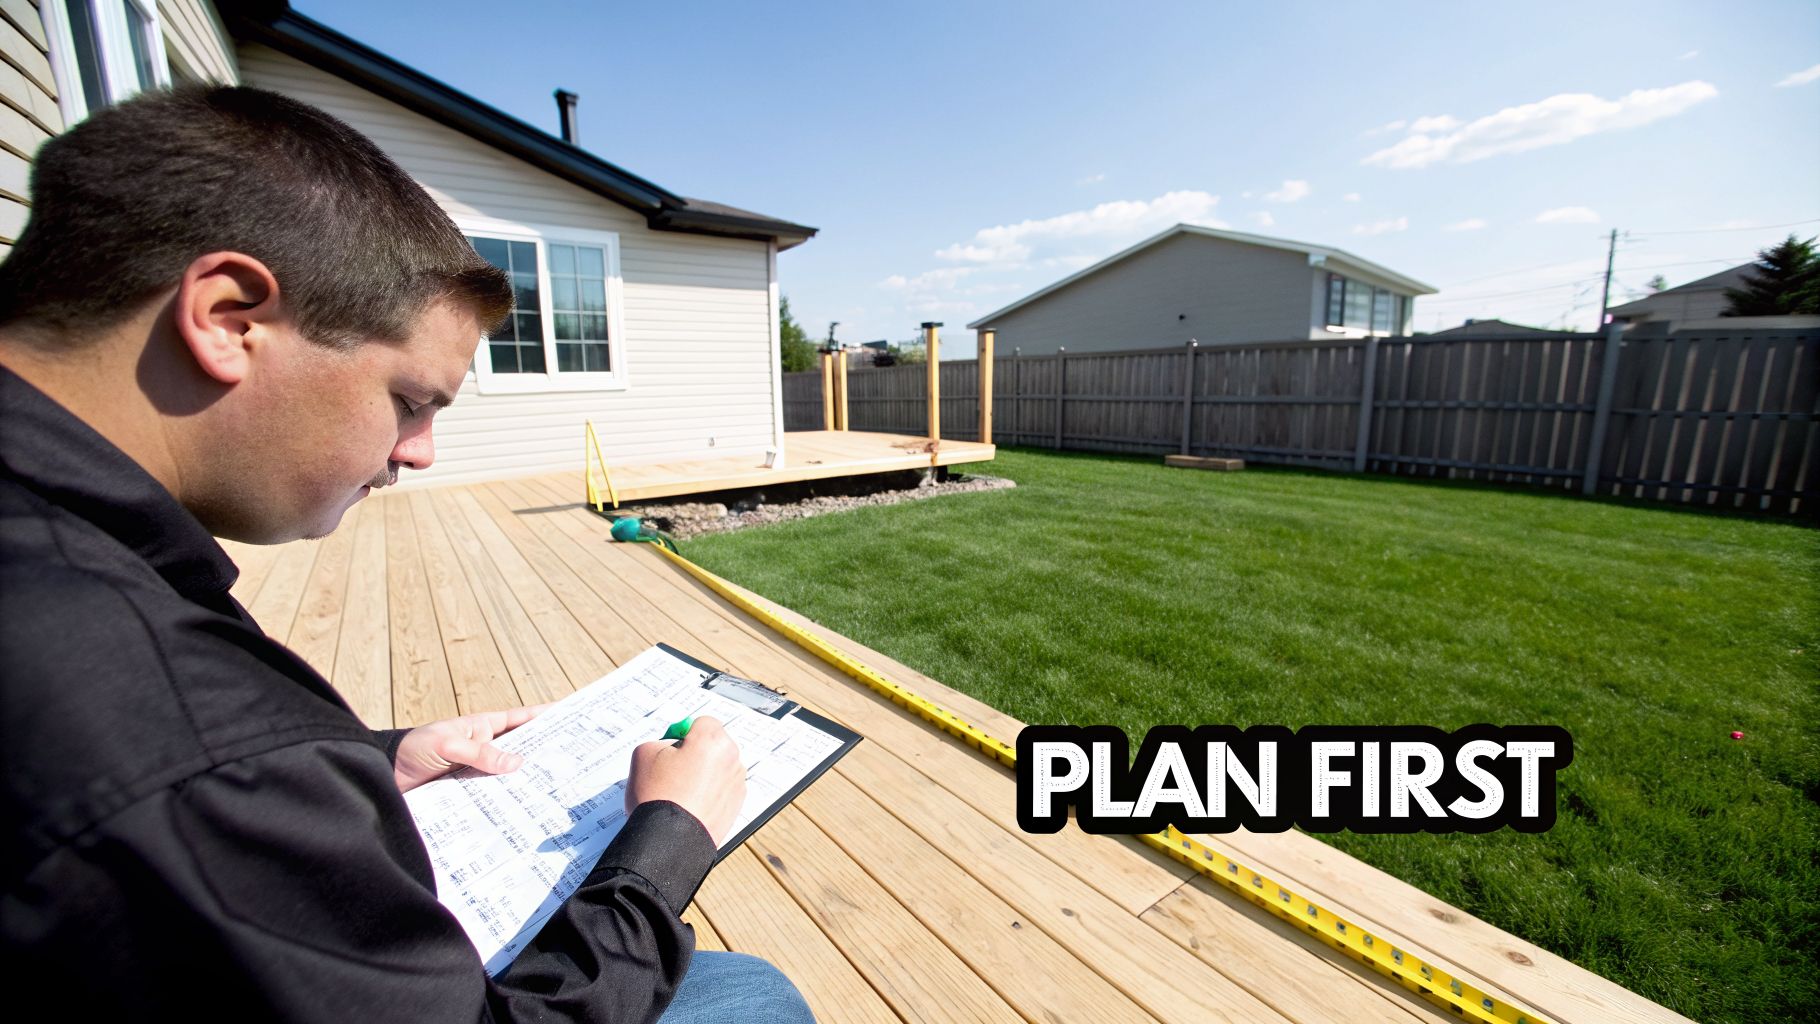
Installing a guardrail is about much more than appearance—it's a critical safety feature for any deck, staircase, or balcony. The goal is to build a secure barrier that prevents falls and meets local building codes, and it all begins with a solid plan.
Planning Your Guardrail Installation Project
Before you pick up a single tool, it's important to understand that the success of your guardrail project depends on your plan. Homeowners who rush the planning phase often face costly mistakes, safety concerns, and the frustration of having to start over. A well-thought-out plan serves as your blueprint for every step, from purchasing materials to passing the final inspection.
The importance of these safety barriers is widely recognized. The global market for road guardrails reached approximately $5.3 billion in 2023 and is projected to grow. As noted in market analysis from Verified Market Reports, this growth is driven by major infrastructure projects and a global emphasis on improving safety. This highlights how vital a well-planned railing is, whether on a highway or your own back deck.
To keep your project organized, a simple checklist can be invaluable. It helps you structure your tasks and ensures no critical steps are missed before construction begins.
Guardrail Planning Checklist
| Planning Phase | Key Action | Pro Tip for Connecticut Homeowners |
|---|---|---|
| Site Assessment | Examine the site to identify slopes, obstacles, and the installation surface (wood, concrete, soil). | Look for exterior outlets, sprinkler heads, and property line restrictions that are common in suburban areas. |
| Utility Check | Call 811 ("Call Before You Dig") at least a few days before any planned digging. | This is a free and legally required service. Hitting a utility line is a dangerous and expensive error. |
| Measurement | Measure all lengths, corners, and stair dimensions (rise and run). | Always double-check your measurements. For stairs, an angle finder is an inexpensive tool that eliminates guesswork. |
| Material Calculation | Calculate the number of posts, rails, balusters, and hardware required. | Purchase about 10% extra material to account for potential mistakes. This is better than stopping mid-project for another store run. |
| Code & Permit Review | Contact your local building department to verify code requirements and apply for a permit if needed. | Do not assume your project is too small for a permit. Most Connecticut towns require one for new or replacement guardrails. |
This checklist is more than just a list of tasks; it's your first defense against project delays and budget overruns.
Conducting a Thorough Site Assessment
Your first practical task is to survey the installation area. Walk the site and carefully look for anything that could complicate the installation.
Is the ground level, or does it slope? An uneven surface will require posts of different heights and may involve custom angle cuts for your rails. What surface will you be mounting to? A wooden deck, a concrete patio, and soil each demand different anchoring methods to ensure the posts are secure.
Also, be sure to identify existing obstacles. Note things like:
- Outdoor electrical outlets that you will need to work around.
- Drainage spouts or sprinkler systems that might affect post placement.
- Proximity to property lines or other structures that could limit your workspace.
A common mistake is forgetting to check what lies beneath the surface. Before digging any post holes, you must call 811 to have underground utility lines marked. Hitting a water main or an electrical line is a significant and costly problem to be avoided.
Accurate Measurements and Material Estimation
After assessing the site, it's time to use your tape measure. Precision at this stage is essential for purchasing the correct amount of material, avoiding waste, and preventing extra trips to the store.
For a straight section, simply measure the total length. For corners or angles, measure each straight segment individually. For stairs, you need two key measurements: the horizontal distance the stairs cover (the run) and their total vertical height (the rise). These numbers are necessary for determining the correct stair rail angle.
Remember to account for post spacing. As a general guideline for wood railings, place posts no more than 6 feet apart to ensure the railing is strong and rigid. For vinyl or metal systems, always consult the manufacturer's specifications, as their spacing requirements may differ. Use these measurements to create your final shopping list: posts, rails, balusters, and all necessary hardware.
Understanding Connecticut Codes and Permits
This step is mandatory. You must be familiar with the local building codes for your guardrail project. In Connecticut, safety regulations for residential guardrails are specific and strictly enforced. For example, any deck, porch, or walkable surface more than 30 inches above the ground requires a guardrail.
Here are a few key Connecticut code requirements you must know:
- Height: Guardrails must be at least 36 inches high, measured from the deck surface.
- Baluster Spacing: The space between balusters cannot be large enough for a 4-inch sphere to pass through. This is to protect small children.
- Structural Strength: The finished guardrail system must be strong enough to withstand 200 pounds of force applied in any direction, at any point.
Before starting, your first call should be to your town’s building department. Most municipalities in Connecticut require a building permit for a new guardrail or a major replacement. Obtaining a permit is not just about paperwork; it officially documents your project and protects you from potential fines and liability.
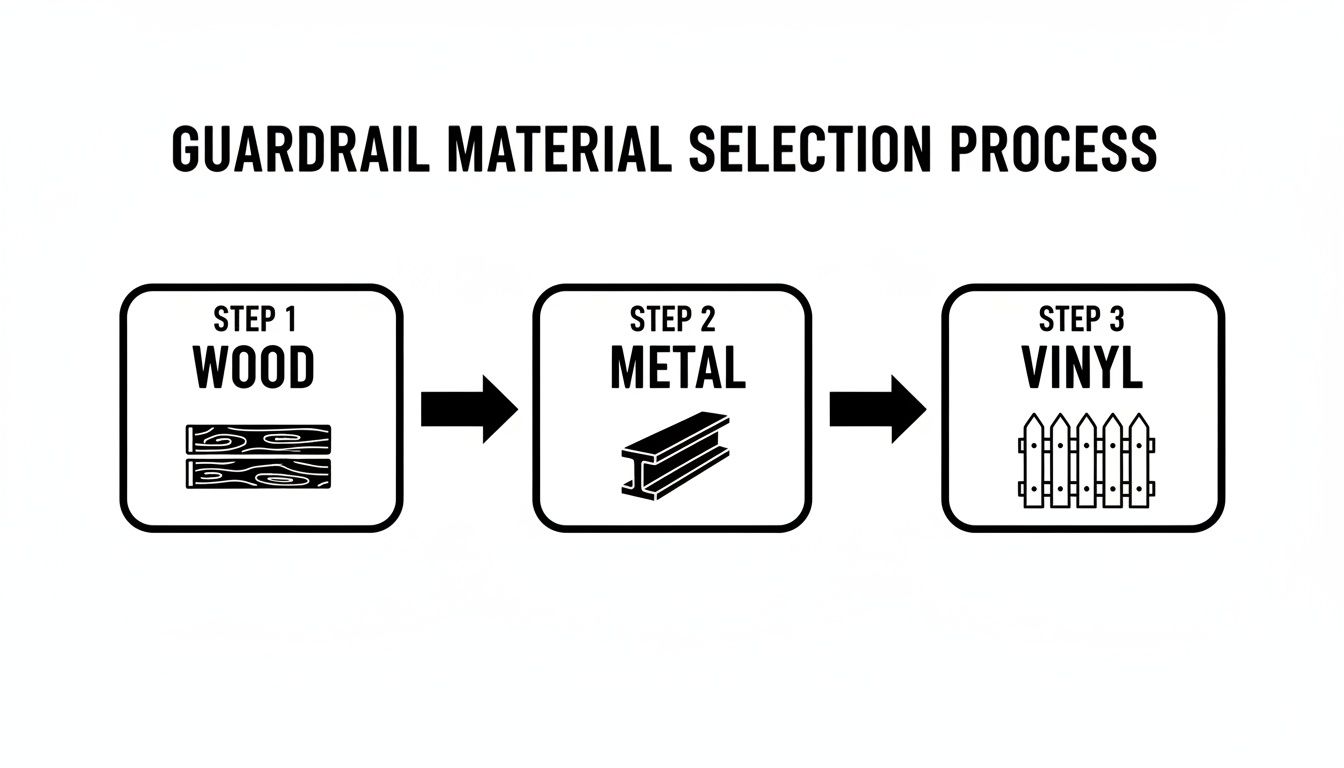
Choosing the Right Guardrail Materials and Tools
Selecting the right material for your guardrail is a major decision. It affects more than just appearance; it determines durability, maintenance requirements, and the final cost. Let's review the pros and cons of common options to help you find the best fit for your home.
Comparing Common Guardrail Materials
Each material responds differently to Connecticut's varied climate, from humid summers to icy winters. Understanding these differences is key to installing a guardrail that will last for years.
Wood Guardrails
Wood is a classic choice for a reason. It offers a warm, natural look that complements almost any home. The most popular options are cedar and pressure-treated pine.
- Pros: Wood is often the most affordable option upfront. It is widely available and can be stained or painted to match your home's exterior. Many people prefer the solid, traditional feel of a real wood railing.
- Cons: Wood requires the most maintenance. To prevent rot, warping, and splinters, it must be re-stained or sealed every 1-3 years. Neglecting this maintenance will lead to rapid deterioration.
If you are considering wood, be realistic about the long-term maintenance. The attractive initial price is only part of the total cost; the true cost includes the time and materials for ongoing upkeep.
Vinyl (PVC) Guardrails
Vinyl has become extremely popular for good reason. For homeowners who prefer to relax rather than perform deck maintenance, it offers a great low-maintenance solution.
- Pros: Vinyl is very durable. It resists moisture, rot, and insects, and it never needs painting or staining. A simple wash with soap and water is all that is needed to keep it looking new.
- Cons: The initial cost of vinyl is higher than wood. While strong, it can become brittle in freezing temperatures and may crack under a sharp impact. The color selection is also more limited compared to the endless options available with paintable wood.
Metal Guardrails (Aluminum and Steel)
For a clean, modern appearance, metal is an excellent choice. These systems are known for their strength and longevity. Aluminum is a top choice for residential projects because it is lightweight and will not rust.
- Pros: Aluminum is virtually maintenance-free, making it a great option for Connecticut's coastal homes where salt spray is a concern. It offers a sleek, minimal profile that is perfect for preserving a view. For more ideas on achieving this high-end look, see our guide to ornamental fences and railings.
- Cons: Metal railings typically have the highest initial cost. While steel is incredibly strong, it must be well-galvanized or powder-coated to prevent rust. If the coating is deeply scratched, rust can form over time.
Your Essential Guardrail Tool Checklist
Having the right materials is only half the job. Using the proper tools can make the difference between a frustrating task and a clean, professional-grade installation. There is nothing worse than having to stop work for an unplanned trip to the hardware store.
Here is a straightforward list of tools you should have ready before you start.
| Tool Category | Specific Tools You'll Need | Why It's Important |
|---|---|---|
| Measuring & Layout | Tape Measure, Carpenter's Square, Level (a 4-ft one is best), Chalk Line, Angle Finder | Essential for ensuring posts are perfectly vertical, rails are level, and baluster spacing is consistent and code-compliant. |
| Cutting | Miter Saw, Circular Saw, Jigsaw | A miter saw is ideal for making clean, accurate angle cuts on rails, especially for stairs. |
| Drilling & Fastening | Drill/Driver, Socket Wrench Set, Auger Bit, Appropriate Drill Bits | Used for pre-drilling holes to prevent wood from splitting and for securely driving all screws and bolts. |
| Post Installation | Post-Hole Digger (or Auger), Shovel, Wheelbarrow, Trowel | Necessary if you are setting new posts in concrete footings for a ground-level deck or patio. |
Organizing your tools before you start is a sign of a well-planned project. It allows you to work efficiently, safely, and achieve a result you can be proud of.
Your Guide to a Secure Guardrail Installation
With your materials gathered and tools ready, the hands-on work begins: the installation of guardrails. A proper installation is what distinguishes a shaky, unsafe railing from a solid system that can be trusted to protect your family for years. Let's cover the techniques that ensure a secure, professional result.
The overall strength of your guardrail system depends on the posts. They are the foundation. If the posts are weak or installed incorrectly, the rest of the railing will not be secure. Your primary task is to ensure every post is perfectly vertical, correctly spaced, and anchored so firmly that it feels like part of the structure.
Proper guardrail installation is not just for looks; it is a key part of comprehensive safety strategies for working at heights. The same principles that keep professionals safe are just as important for your own deck.
Anchoring Your Posts: The Foundation of Your Railing
The method for anchoring posts depends on the surface you are mounting them to. A wooden deck and a concrete patio require very different approaches.
- For Wood Decks: The best practice is to attach posts to the deck's frame—the joists—not just the surface boards. Use heavy-duty 1/2-inch through-bolts or lag screws to create the strongest possible connection to the rim joist. Never just screw posts to the deck boards, as they will not hold under pressure.
- For Concrete Patios: This requires heavy-duty concrete anchors. The most reliable method is to drill into the concrete and use wedge anchors or sleeve anchors to bolt down a metal post base. The guardrail post then fits securely into this base.
Regardless of the surface, use your level. Before tightening the final bolt, check that each post is perfectly vertical (plumb) on two adjacent sides. A small lean at the base will result in a noticeable tilt at the top.
Attaching the Top and Bottom Rails
Once the posts are secure, you can install the rails. This part of the process requires precision. Clean cuts and accurate measurements create a tight, seamless appearance between posts. The top rail serves as the main structural component and handhold, while the bottom rail anchors your balusters.
Start by measuring the distance between your posts at both the top and bottom. These measurements are rarely identical. Transfer these exact dimensions to your rail material and use a miter saw for the cuts to get perfectly straight edges for a professional fit.
You can attach the rails using specialized railing brackets or by toe-nailing (driving screws at an angle). For most DIY projects, brackets are the easier and more reliable option.
Pro Tip: When working with wood, always pre-drill your screw holes, especially near the ends of the rail boards. This simple step prevents the wood from splitting and weakening.
Installing Balusters and Infill
With the railing frame complete, it is time to add the balusters (also known as spindles or pickets). The most important factor here is the spacing. To meet Connecticut safety code, the gap between your balusters cannot allow a 4-inch sphere to pass through. This rule is in place to prevent a small child from getting stuck.
Here’s a simple method for achieving consistent spacing:
- Measure the total length of the opening between two posts.
- Add the width of one baluster to your desired gap size (e.g., 3.5 inches).
- Divide the total opening length by that number to determine how many balusters are needed for that section.
- From there, you can calculate the exact center-to-center measurement for uniform spacing.
Attach balusters to the rails with weather-resistant screws. A helpful trick is to cut a small block of wood to the exact width of your required gap. Use it as a spacer as you install each baluster for perfect, identical gaps without repeated measuring. For a classic, durable look, you can also take inspiration from traditional post and rail options that often pair well with modern guardrail designs.
Tackling Stair Railing Installation
Now for the most challenging part of the project: stairs. Installing guardrails on a staircase involves working with angles. Ensuring the railing perfectly matches the slope of the stairs is crucial for both safety and appearance.
First, you must determine the angle of your staircase. An angle finder is the best tool for this, but you can also figure it out with a level and a straightedge. Once you have the angle, set your miter saw to match it. You will use this angle to cut the top and bottom of your stair posts and the ends of your stair rails.
Remember, the balusters on a stair railing must always be vertical, not angled. This means the top and bottom of each baluster will need to be cut at an opposing angle to fit snugly between the sloped rails while remaining perfectly straight. Take your time here. The saying "measure twice, cut once" is especially true for stair railings.
Choosing your material is a significant decision that affects everything from budget to maintenance. This table summarizes the most common choices.
Guardrail Material Comparison
| Material | Average Cost (Per Linear Ft) | Maintenance Level | Best For |
|---|---|---|---|
| Wood | $15 – $40 | High | Classic looks, custom designs, and homeowners who don't mind upkeep. |
| Metal | $30 – $150+ | Low | Modern aesthetics, durability, and minimal long-term maintenance. |
| Vinyl | $20 – $50 | Very Low | Budget-conscious projects and achieving a clean, maintenance-free look. |
As you can see, there is a balance between initial cost, long-term effort, and the final appearance you want to achieve.
The material you choose can significantly affect the installation process. While wood offers the most design flexibility, metal and vinyl systems often come in kits. These kits can be a great help, especially for standard layouts, as they eliminate much of the complex cutting and measuring.
Final Checks for Safety and Code Compliance
The tools are put away, and your new guardrail is installed. It looks great, but the job isn't finished yet. The final and most crucial step is a detailed walkthrough to ensure your work provides real-world safety and complies with all Connecticut building codes.
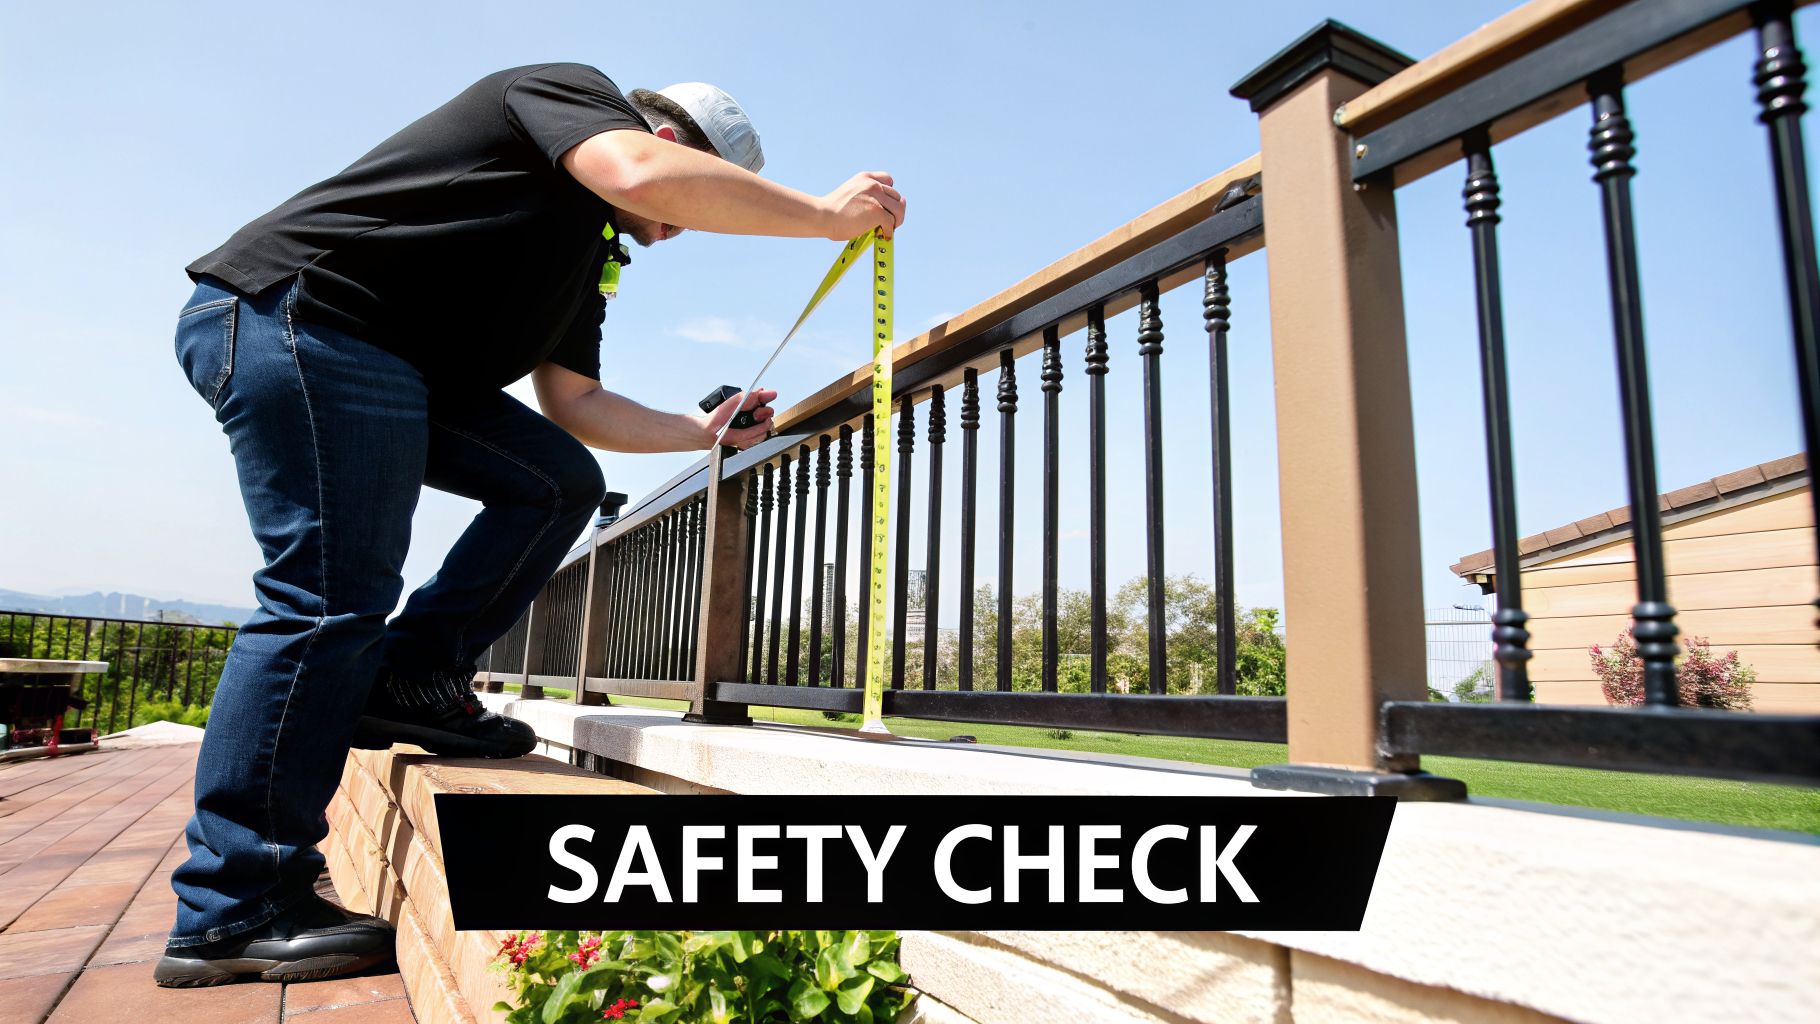
This is more than just admiring your work. A guardrail that looks secure but is not can be a serious hazard, creating a false sense of security. You need to be confident it will hold when someone leans on it. This final review is your quality control check, protecting your family, satisfying the building inspector, and validating your project.
The Structural Integrity Test
Before getting your tape measure, perform a "shove test." Go to each post and give it a firm push from a few different angles. Is there any wobbling or flexing? A properly installed post should feel completely solid, as if it is part of the deck structure itself.
Next, test the top rail. Grab it midway between two posts and apply significant side-to-side force. Code requires a guardrail to withstand 200 pounds of force at any point. You don't need special equipment for a field test; a solid, sustained push will reveal any give or bowing. If you feel movement, you have found a weak point that needs to be reinforced.
Verifying Key Code Requirements
Once you are confident in the structure's strength, get your tape measure. It's time to confirm your installation of guardrails meets the strict, non-negotiable standards of the state building code. These dimensions are all about preventing falls and protecting small children.
Be sure to verify these three critical measurements:
- Guardrail Height: The top of the rail must be at least 36 inches from the deck's surface. Check this in several places to ensure it is consistent.
- Baluster Spacing (The 4-Inch Rule): The gap between each baluster must be small enough to prevent a 4-inch diameter sphere from passing through. This is a vital safety rule designed to keep toddlers from squeezing through.
- Stair Railing Height: On stairs, the handrail height is slightly different. It must be between 34 and 38 inches, measured vertically from the leading edge (nosing) of the stair treads.
Precision is critical here. Inspectors have been known to fail an entire project because a rail was a half-inch too short. Double-check your measurements now to avoid a frustrating and costly rework order.
Final Surface and Hardware Inspection
With the major structural and code checks complete, perform one last detailed inspection. Run your hand along the top rail and down the posts. Are there any splinters, sharp metal edges, or protruding screw heads? Sand down or fix any of these minor hazards now to prevent injuries.
Finally, examine every piece of hardware—every screw, bolt, and bracket. Check to ensure they are all tight and secure. Look for signs of over-tightening, such as split wood or stripped screw heads, as these can compromise the connection. Every fastener is a link in the chain, and this final inspection ensures the entire system is strong and safe for years to come.
Common Mistakes and When to Call a Professional
Even with a detailed plan, things can go wrong on a DIY project. With guardrail installation, precision is key, and a few common errors can turn a weekend project into a major safety hazard. Knowing what to watch for can help you avoid trouble or recognize when it’s time to call an expert.
The most frequent mistake is unstable post installation. This often happens when people use inadequate footings or the wrong anchors. A post that is not completely solid—whether anchored to the deck frame or set in concrete—is a formula for failure. Your entire guardrail system is only as strong as its foundation.
Another common error is incorrect rail height and baluster spacing, especially on stairs. It is surprisingly easy to get the angle slightly wrong, which can result in a top rail that doesn't follow the slope of the stairs or, worse, gaps that a child could slip through. The 4-inch sphere rule is not a suggestion; it's a critical safety standard.
Addressing Common Installation Problems
The key is to identify these problems early. If you've set a post and it wobbles at all, do not ignore it. You will likely need to go back and add blocking between your deck joists or replace lag screws with stronger through-bolts. It is extra work, but it is essential for safety.
If your baluster gaps are inconsistent, there is no shortcut. You have to remove them and start over. A helpful tip is to cut a small spacer block to your exact required gap width. Using this block for every baluster is much faster and more accurate than measuring each one individually.
This focus on safety is not just for homes. The temporary guardrail market is a massive $2.40 billion industry in 2024, projected to reach $3.51 billion by 2030. This growth is driven by strict workplace safety regulations and innovations in modular systems that can prevent up to 70% of falls on job sites. You can learn more about these trends by reading about the growth of the temporary guardrail market.
Knowing When to Hire a Professional
So, when does a project become too much for a DIY-er? It depends on the complexity of the job and your personal comfort level. If you feel overwhelmed, it is a good sign that it's time to call in a professional.
Consider hiring an expert in these situations:
- Complex Layouts: Decks with curves, multiple levels, or difficult angles require a level of skill that takes years to master.
- Difficult Terrain: Setting stable posts on a steep slope or on unstable ground is a significant challenge and a major liability if done incorrectly.
- Specialized Materials: Materials like glass railings look fantastic but require specialized tools and expertise. Examples from professional frameless glass installation services demonstrate the necessary precision.
- Guaranteed Code Compliance: If you want absolute certainty that your railing is code-compliant and completely safe, a professional is the only way to ensure it.
The true value of hiring an expert is not just in getting the job done. It is the assurance of a safe, warrantied installation that eliminates stress and saves you time. A professional installer knows the local codes thoroughly and has the right tools for any unexpected challenges.
Deciding to hire a professional is not giving up; it is a smart investment in safety and quality. An expert can often complete the work faster, with a better finish, and their work is typically guaranteed. If your finished railing is damaged later on, our team is here to help. You can learn more about our fence and guardrail repair services and how we can restore your railing.
Your Top Guardrail Questions, Answered
Preparing to install a new guardrail often brings up many questions. We understand. Over the years, we have heard nearly all of them from Connecticut homeowners. Here are the answers to the most common questions we receive, directly from our team of experts.
Do I Really Need a Permit to Install a Guardrail in Connecticut?
In most cases, yes. If you are building a new deck, the railings are included in that permit. The same generally applies to any major replacement of an existing railing system. Do not be tempted to skip this step.
A quick call to your town’s building department is all it takes to find out for sure. It’s a simple check that can save you from fines and the major hassle of having to dismantle work that is not up to code.
What Is the Required Height for a Residential Guardrail?
This is a critical safety measurement that must be accurate. For residential decks and balconies in Connecticut, the top of your guardrail must be at least 36 inches from the walking surface.
Handrails for stairs are slightly different. Their height is measured from the front edge (nosing) of each step and typically needs to be between 34 and 38 inches. Always confirm these dimensions with your local code official, as this will be one of the first things an inspector checks.
How Far Apart Should My Guardrail Posts Be?
Post spacing is not a universal number; it depends entirely on the railing material you are using. Your top priority should be to follow the manufacturer’s installation guide precisely.
- Wood Railings: A good rule of thumb is to space posts no more than 6 feet apart. This ensures the entire system is rigid and can handle the required side force without bowing or failing.
- Metal or Composite Systems: These modern materials are often stronger, allowing for wider spacing, sometimes up to 8 feet. However, the manufacturer’s specifications are the final authority.
Your posts are the backbone of the entire guardrail. We have seen too many failures caused by posts that were spaced too far apart or were not anchored correctly. Proper post installation is non-negotiable for a safe, long-lasting railing.
What Are the Best Guardrail Materials for Coastal Connecticut?
If you live near the shoreline, you know that the salty air can be harsh. It corrodes metal and accelerates wood rot. You need materials that can withstand this environment.
Your best options for a coastal home are:
- Aluminum: This is our top recommendation. Aluminum does not rust. When you choose a system with a durable powder-coated finish, you get a railing that looks great for years with almost no maintenance.
- Vinyl (PVC): As a synthetic material, vinyl is immune to salt and moisture. It will not rust, rot, or degrade, making it another excellent, low-maintenance choice for coastal areas.
While beautiful, materials like wood or even standard steel will require constant maintenance to resist corrosion and decay in a salt-heavy environment.
Feeling confident about your project is the first step. For a professional, stress-free experience from planning to completion, trust the experts at Connecticut Fence Works, LLC. We partner with you to ensure your new guardrail is safe, compliant, and beautifully installed. Get your free estimate today at https://ctfenceworks.com.